So I browsed recipes and got some tips from my Tweeps.
Here is the best of what I learned about cake poppin'.
But just know that to make picture-perfect cake pops like the ones you might see on a crazy baker web site or over at Crazy Crafty Christina's blog you will need a strong Type-A personality, special tools, the perfect dipping chocolate, and a fancy camera. I have none of those items, but I did borrow my sister-in-law's nice camera for the party.
So my recipe, if you will, is for . . .
Realistic Cake Pops
Good-Enough Cake Pops
Not-Necessarily-Perfectly-Round-or-Smooth Cake Pops
Most-Likely-To-Not-Be-Featured-on-Bakerella.com Cake Pops
Cake Pops for the Craftily Challenged
Here you go:
1. Make and bake a cake. Preferably not in an Easy-Bake Oven. Let your kids stir up the mix a bit cuz they will remember it fondly when they grow up.
2. Let it cool.
3. Take the cake out of the pan, bash it up, and put it in a large mixing bowl, not a fish bowl.
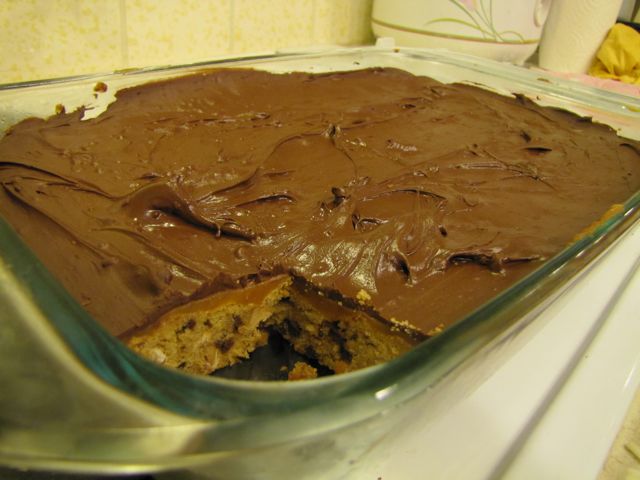
I did one batch of chocolate cake and vanilla frosting and one batch of yellow cake with chocolate frosting. Both of them were delicious and overly consumed by moi.
4. Add at least 1/2 of the tub of artery clogging, artificial everything frosting to the bashed up cake.
Special Tip #1 - Probably best to add a little more than 1/2 the tub of frosting. It makes for some good glue to hold the ball together and if you don't put enough in, they get a little cracky.
5. Mix the cake and frosting with a fork until you are bored. Then use your hands until it is thoroughly mixed and begging to be shaped into balls.
6. Roll that mixture into balls with your hands.
Let your kids help you with this, but don't expect the balls to be perfectly bally. But who cares? It's for a three-year-old's birthday party, not a magazine cover. Unless it's for a magazine cover - in that case just go buy the cake pops. Make the balls not too big, not too small. Maybe about the size of a walnut. Unless walnuts greatly vary in size (do they?). If that's the case, I don't know what to tell you.
7. Put the balls on a cookie/baking sheet lined with wax or parchment paper and put in your refrigerator for at least an hour.
Some internet peeps said to freeze, others said that freezing them was lame. Don't leave the balls in there for more than 24 hours or they begin to dry out.
8. Get some melting chocolates and put them on the stove in a non-stick pot to melt.
Special Tip #2: Don't use a stainless steel pot like I did with my first batch of purple melting junk. Because well, it just doesn't work and I had to toss it.
9. Dip the tip of fancy sticks you bought from a craft store or ones you collected from the tootsie pops your kids just ate, into the melted chocolate and then stick it about half way into the ball.
10. Stick all the balls (now with sticks in them) back in the fridge so that chocolate, (which acts like glue, but won't get you high), will harden.
10. After a few minutes, take out one pop at a time and begin the arduous dipping process. And by dipping I mean DON'T DIP!
Use a spoon to drip the chocolate onto the ball. Get it all over that bad boy. I am sure the unrealistic cake pop recipes have a fancy way of doing this so the chocolate goes on perfectly smooth. But I am sure that is more time consuming and stressful so just get the surface of the ball covered and move on with your life.
11. After the ball is unevenly lathered with the melting chocolate then shake on your sprinkles, chocolate chips, shards of glass, or whatever else you think would make a great topping for your pops.
12. Stick the pops in a flat piece of styrofoam.
We always throw away styrofoam when it comes in packaging because our cats eat it and then puke it up. (Who says styrofoam is not recyclable? Tell that to my cats.) Therefore, I had to buy a piece of styrofoam at the craft store . . . perhaps the most painful part of my cake-pop journey.
I made a cake-pop bouquet with some of the cake pops (on an $8 styrofoam ball!) and covered others with treat bags and ribbon as party favors.
Special Tip #3 If you make your balls too big or they won't fit into the treat bags and you will have to eat them right there on the spot.
The birthday girl loved the cake pops = success!
The birthday girl's mom loved the cake pops = cake pop booty.


 Welcome friends, family, randoms, lurkers, blog addicts, fellow desperate moms, and Bono. This blog consists of mostly funny stuff that will make you feel better about yourself. Lots of mom comedy, non-Kodak moments, and un-fashion tips. On Wednesdays I write about my life as a former childhood actress complete with posts about how the entertainment business works, actors I met (or stalked), people and animals I worked with, my Hollywood friends, and photos of former teen heartthrobs. And if that’s not enough to draw you in to follow me . . . I have done some amazing giveaways. A rubber chicken, millions of doll hairs, and unlimited supplies of air. Come join the party.